I recently kicked off a brand new Django Rest Framework API for a project I’m hacking on. I decided to stick with my reliable webhost, Namecheap, even though I’d never actually run Python on their shared servers before.
Once I got the initial setup live, the “old way” of doing things hit me like a ton of bricks. I was manually copying files over to the server via SFTP. I did it exactly once before realizing: it’s 2026, and I am far too lazy for this.
Simple Deploy Process
The goal was to move away from the “drag-and-drop” nightmare and into a streamlined git-based flow:
- SSH into my Namecheap server.
- Navigate to the directory hosting my Django app and clone the repo.
- Every future deploy should just be a quick SSH session and a
git pull.
SSH Keys and Access
Before the magic happens, you have to sort out the “handshakes.” This is the foundation of getting an AI Agent to do your dirty work. I had to set up SSH keys in both Namecheap and GitHub.
- Home Access: My local machines needed SSH access to Namecheap so my AI agent could log in and run commands.
- Server Access: The Namecheap server itself needed its
.pubkey registered with GitHub to pull the private repository during the deploy. - Pro Tip: I generated a key path that works across all my different work computers for consistency:
~/.ssh/<keyname>.pub.
Need a domain to go with that hosting? Grab one at Namecheap before you start.
Finally, Setting Up the AI Agent in OpenCode
I dove into the OpenCode documentation to wrap my head around Agents, tools, skills, and commands. I wanted a clean architecture where the “logic” of a Django deploy was separate from the “data” of my specific project.
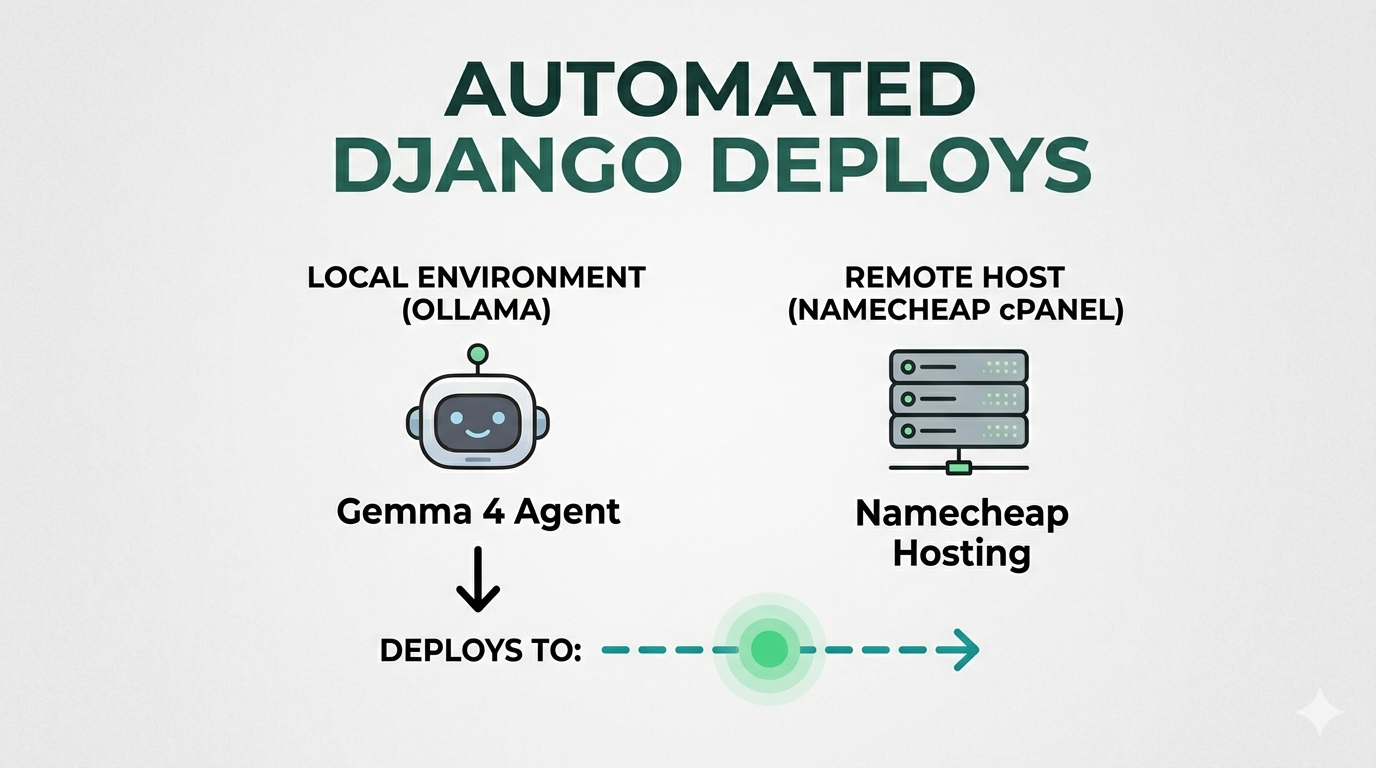
Note: This setup assumes you are hosting a local AI model like Gemma 4 in Ollama (check my previous post here) and that it’s up and running.
1. The Global Agent
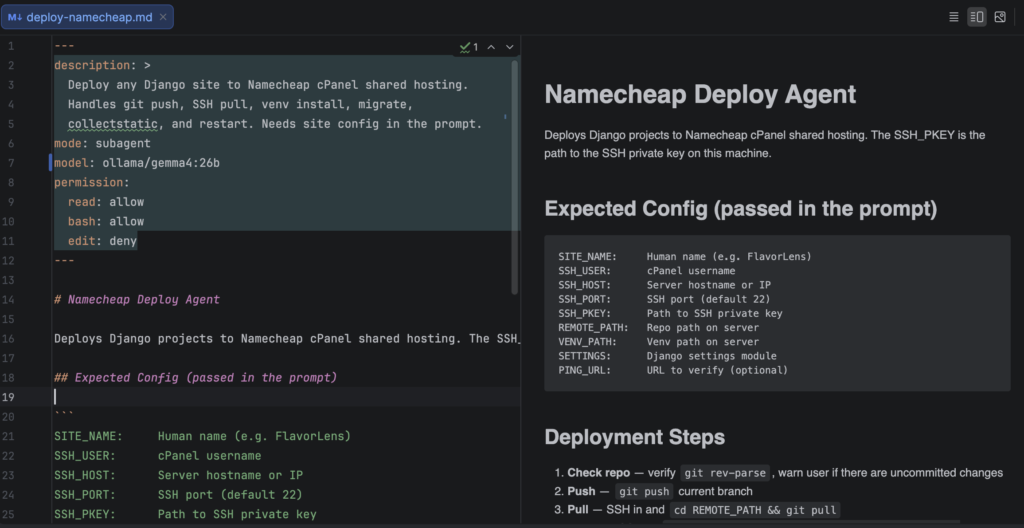
I defined this in ~/.config/opencode/agents/deploy-namecheap.md. This is the “brain” that knows how to deploy to Namecheap in my global config that any future site project can use.
---
description: >
Deploy any Django site to Namecheap cPanel shared hosting.
Handles git push, SSH pull, venv install, migrate,
collectstatic, and restart. Needs site config in the prompt.
mode: subagent
model: ollama/gemma4:26b
permission:
read: allow
bash: allow
edit: deny
---
# Namecheap Deploy Agent
Deploys Django projects to Namecheap cPanel shared hosting. The SSH_PKEY is the path to the SSH private key on this machine.
## Expected Config (passed in the prompt)
```
SITE_NAME: Human name (e.g. FlavorLens)
SSH_USER: cPanel username
SSH_HOST: Server hostname or IP
SSH_PORT: SSH port (default 22)
SSH_PKEY: Path to SSH private key
REMOTE_PATH: Repo path on server
VENV_PATH: Venv path on server
SETTINGS: Django settings module
PING_URL: URL to verify (optional)
```
## Deployment Steps
1. **Check repo** — verify `git rev-parse`, warn user if there are uncommitted changes
2. **Push** — `git push` current branch
3. **Pull** — SSH in and `cd REMOTE_PATH && git pull`
4. **Install** — SSH in, `source VENV_PATH/bin/activate && pip install -r requirements.txt`
5. **Migrate** — SSH in, `source VENV_PATH/bin/activate && export DJANGO_SETTINGS_MODULE=SETTINGS && python manage.py migrate && python manage.py migrate authtoken`
6. **Static** — SSH in, `source VENV_PATH/bin/activate && export DJANGO_SETTINGS_MODULE=SETTINGS && python manage.py collectstatic --noinput`
7. **Restart** — SSH in, `touch REMOTE_PATH/django_app.py` (triggers Passenger reload)
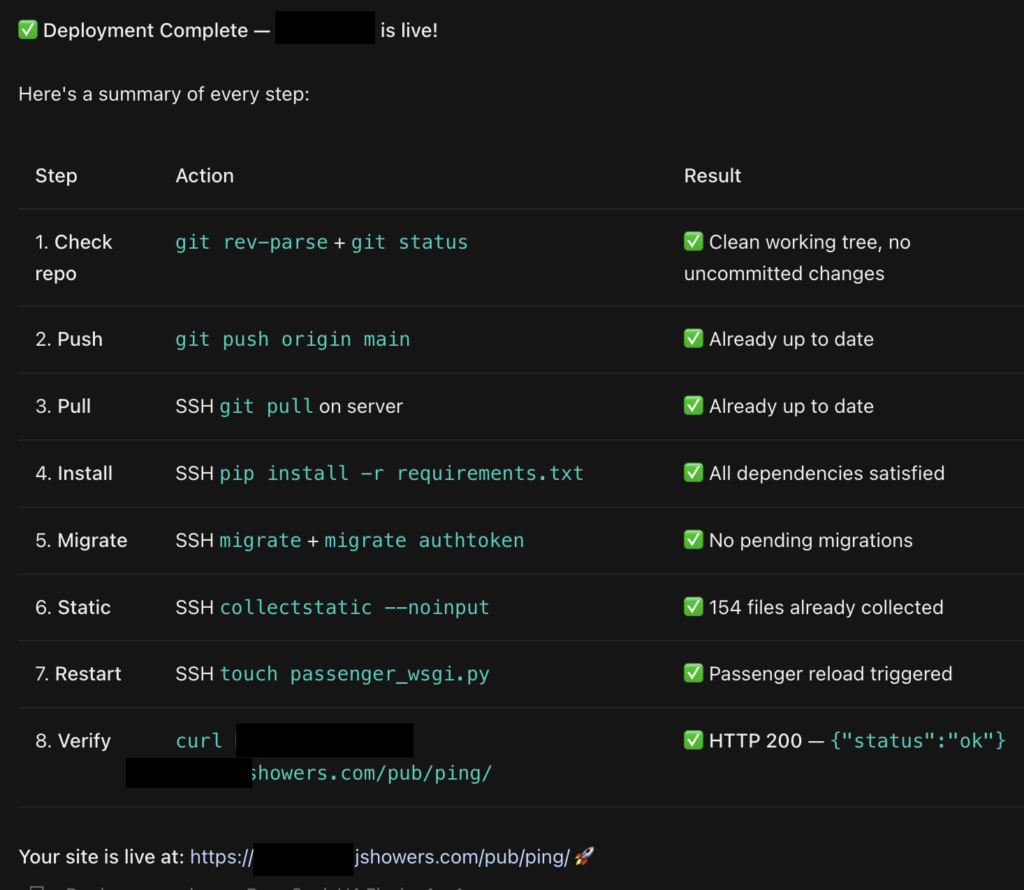
8. **Verify** — if PING_URL provided, `curl -sS PING_URL` — confirm it returns a 200
Output the result of every step so the user can see what happened.
2. The Project Command
Then, I created a project-level command in my repo at <project root>/.opencode/commands/project-name-deploy.md. This tells the agent where to go and will be specific to each of my projects.
---
description: Deploy ProjectName API to Namecheap cPanel at project.jshowers.com
agent: deploy-namecheap
---
SITE_NAME: ProjectName
SSH_USER: myuser
SSH_HOST: jshowers.com
SSH_PORT: <port num>
SSH_PKEY: ~/.ssh/<key name>
REMOTE_PATH: /...
VENV_PATH: /...
SETTINGS: project_name.prod_settings
PING_URL: <host>/pub/ping/
Don’t forget: Restart OpenCode to pick up your new configs!
Why This Setup Rocks
- Save Your Cash: Because agents can specify their own models, I use my locally running Gemma 4 (via Ollama) for these repetitive tasks. It’s free, so I’m not wasting cloud tokens on simple SSH commands.
- Total Separation: I’ve decoupled the Namecheap deployment logic from my project. If I start a new site, I just create a new project command and point it at the same global agent.
- Scalability: I can (and definitely will) add more projects to this global agent.
Using the Tools
Now, when I’m in an OpenCode session, I just type:
“deploy project name”
Or, if I want to be specific:
“/project-name-deploy”
The agent takes over from there. It handles the Django migrations, manages Namecheap cache backups, and even hits my custom /ping/ endpoint to make sure the site didn’t crash.
Even if I have a fancy paid cloud model selected for my main chat, this deploy task gets delegated to my local Gemma 4 agent every single time. 👍