I was recently “gifted” a nice MacBook Pro and decided I want to use it to run AI models locally. I’ve become accustomed to working with AI Harnesses (Claude Code, OpenCode, etc.) but hate the cost. Here is a free and private solution that works locally.
Goals:
- Get an open-source AI coding model running locally.
- Connect a code harness, like OpenCode, to my local model.
- Use both on an existing repo to scan it and create an
AGENTS.mdfile.
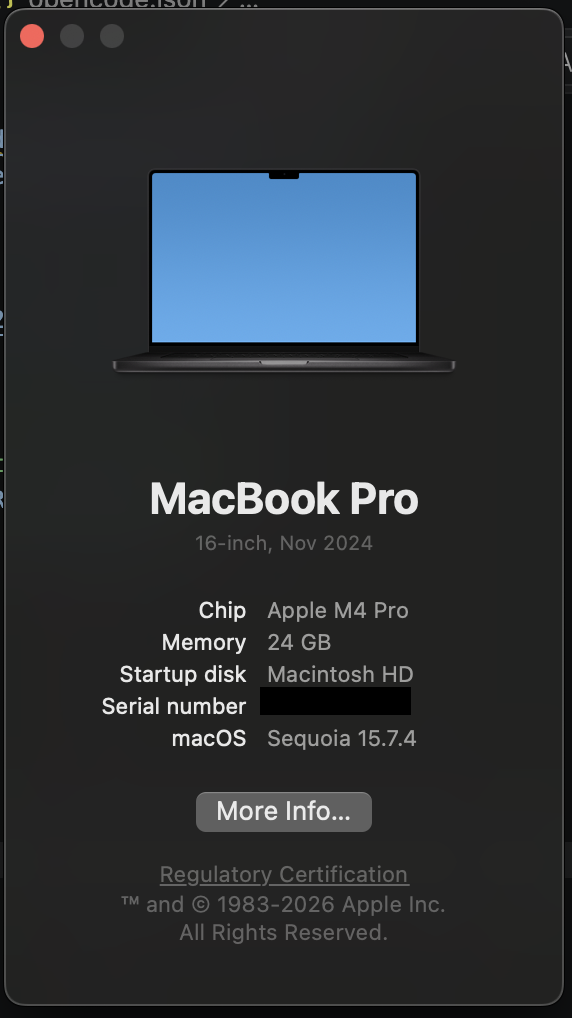
Specs: MacBook Pro, M4, 24GB Memory, macOS Sequoia 15.7.4.
Step 1: Setting up the Local Brain (Ollama)
The first step is getting the “engine” running. I used Ollama, which is the gold standard for running Large Language Models (LLMs) on macOS.
The “ISP” Hurdle
When I first tried to pull my model, I ran into a weird SSL interception issue with my ISP (Digi). It seems they were flagging the Cloudflare-backed downloads. The Fix: I fired up my VPN (Private Internet Access) to a USA-based node, and the download started immediately.
Pulling the Model
For coding on the M4, you want Qwen 2.5 Coder 14B. It’s a 9GB file, but it hits the “sweet spot” between speed and intelligence. Here are all Qwen 2.5 Coder models.
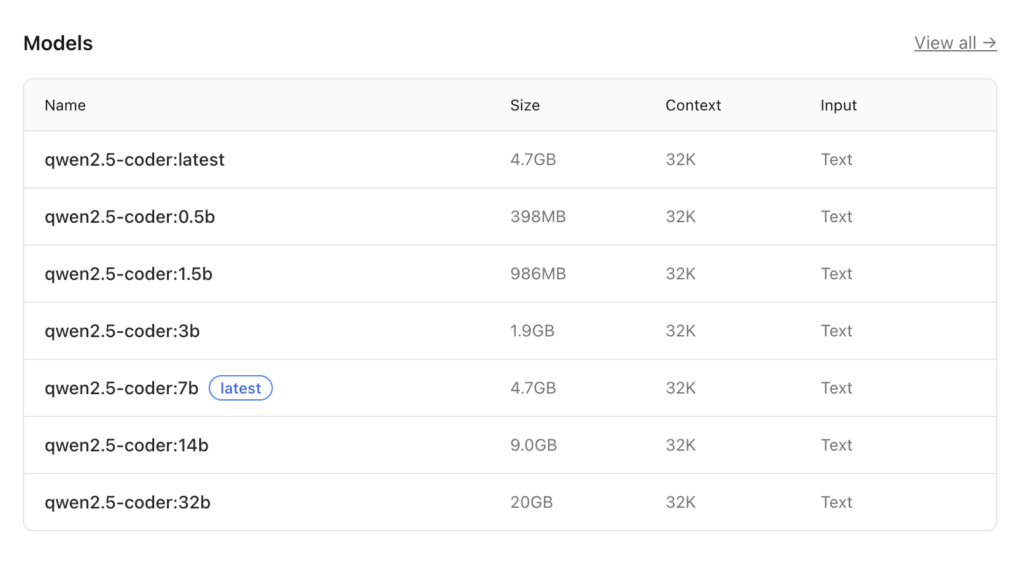
ollama pull qwen2.5-coder:14b

Optimizing Memory
To make sure the model has enough “room to think” about a whole codebase, I bumped up the context window to 32k:
ollama run qwen2.5-coder:14b "/set parameter num_ctx 32768"
The Performance Benchmarks
Running locally on the M4 is shockingly fast. I tested it by asking it to write a Python script to detect ISP proxy interception. It peaked at 92.40 tokens/s for the initial evaluation. That is faster than most paid cloud APIs!
Step 2: Connecting the Harness (OpenCode)
An AI model is just a chat box until you give it tools. OpenCode is a CLI that allows the AI to actually read your files and run terminal commands.
The Installation
curl -fsSL https://opencode.ai/install | bash
The “Bridge” Hack
By default, these apps often push you toward their paid cloud services. To force OpenCode to talk to your local M4, you have to create a custom configuration. We use the openai provider type as a “bridge” because it’s the most stable way to handle tool-chaining with Ollama.
Create or edit your config at ~/.config/opencode/opencode.json:
{
  "$schema": "https://opencode.ai/config.json",
  "model": "qwen2.5-coder:14b",
  "provider": {
    "openai": {
      "name": "Ollama-Bridge",
      "options": {
        "baseURL": "http://127.0.0.1:11434/v1",
        "apiKey": "ollama"
      },
      "models": {
        "qwen2.5-coder:14b": {
          "name": "qwen2.5-coder:14b"
        }
      }
    }
  },
  "permission": {
    "edit": "allow",
    "bash": "allow",
    "read": "allow"
  }
}
Connecting the Model
- Navigate to your code directory and type
opencode. - Type
/connect. - Select the Ollama option that now appears thanks to your config.
- Enter a “bogus” API key (I just used
ollama) and select your local model.

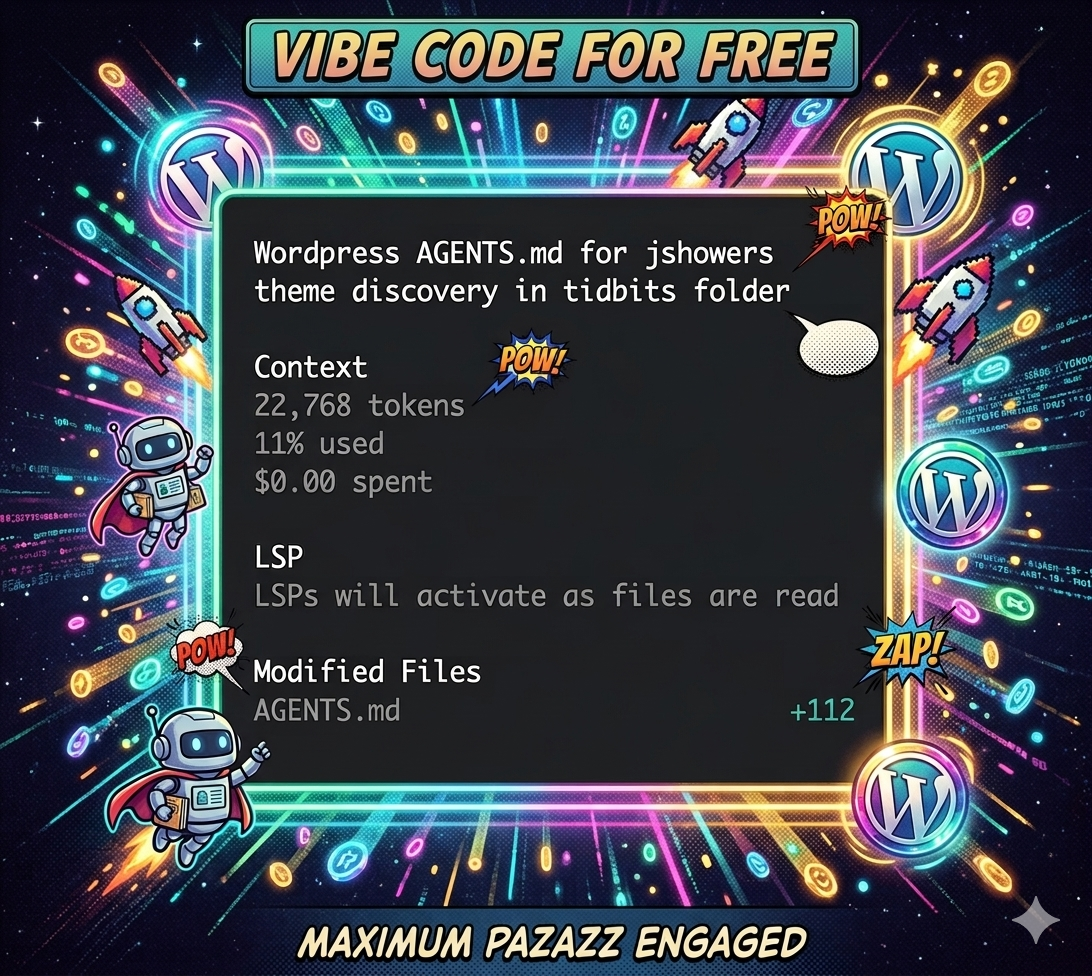
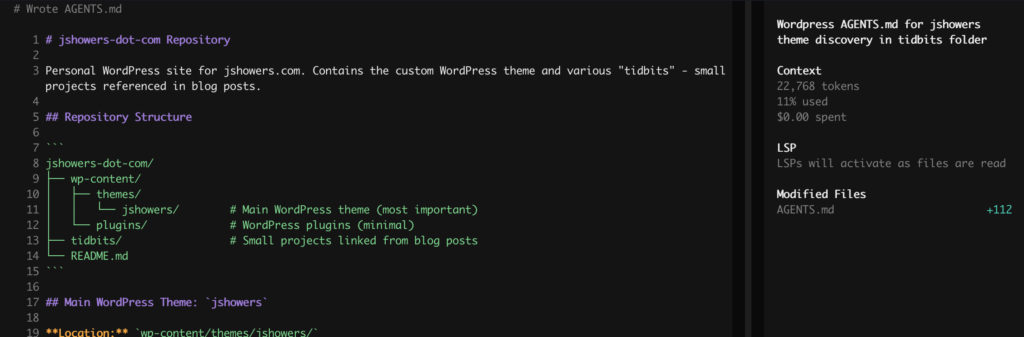
Step 3: Generating the AGENTS.md
I believe that while a README.md is like a travel brochure for humans, an AGENTS.md is the plane’s flight manual for the AI. It tells the agent exactly what the architecture is so it doesn’t hallucinate.
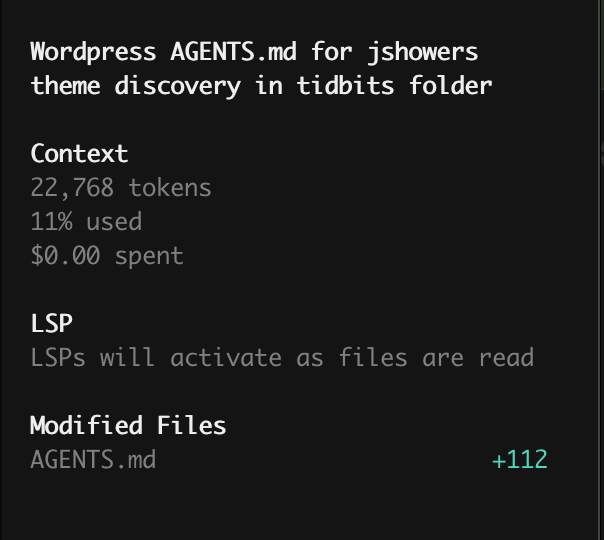
I ran this prompt against my WordPress theme repo:
Generate an
AGENTS.mdfile for this repo. It is a wordpress repo (without the WP files). The jshowers theme is the most important. There is a tidbits folder you can do discovery on. These are linked to from within blog posts. The main feature of this repo is the wordpress theme.
The Result: TADA! Within seconds, the local model scanned my directories, identified the theme logic, and wrote a perfect technical spec. No data left my machine, no tokens were billed to my credit card, and my M4 barely broke a sweat.
Final Thoughts
If you have an M-series Mac, you are sitting on a supercomputer. Stop paying for monthly AI subscriptions and start running your own “Private Dev Agency” right from your terminal.
Total Cost: $0.00. Privacy: 100%. Vibe: Yas.