Summary
- Saves $18/month = $225/year, moving to Namecheap WordPress web hosting.
- Goal: keep theme, adsense, content, photos – but update WordPress and PHP to latest.
- Use built-in WordPress and cPanel migration tools, rather than migrate data manually.
Beginning
Something long on my TODO list was to move this domain, jshowers.com, away from my old expensive webhost (HostGator) and save some money. I’ve been paying around $25/month for years now, when there are many cheaper alternatives. The only thing holding me back was knowing how unorganized I’ve been in the past, how many sub folders and little projects and tidbits I’ve attached to this domain over the years.
Well… hello from the other side! This blog is now hosted with Namecheap WordPress web hosting, saving me $225/year. Here is how I recommend migrating your WordPress site (and any tagalong code) from one webhost to another.
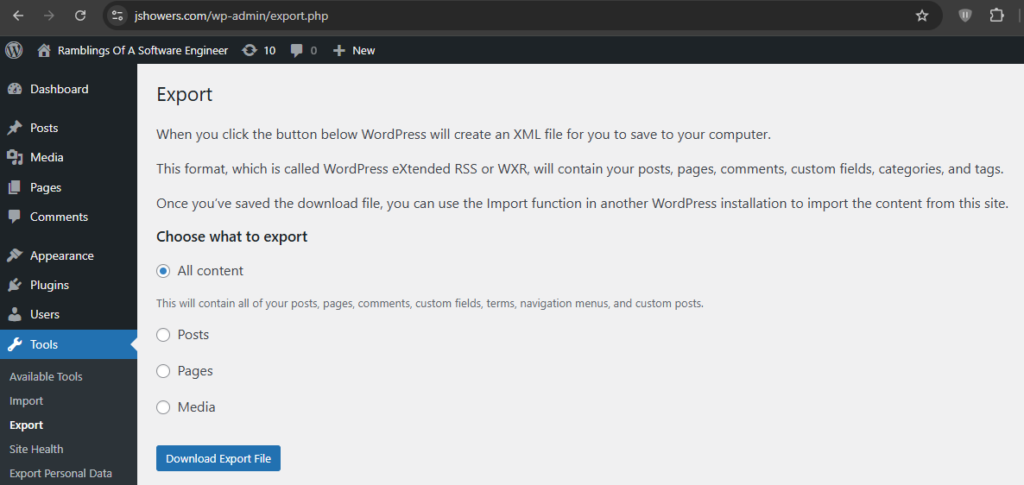
Step 1: Exporting Your Content
Before touching the new host, grab your data from the old one.
- Navigate to WP-Admin -> Tools -> Export.
- Select All Content.
- Download the XML export file.
Step 2: The “Ghost” Migration (Using your Hosts File)
The secret to a zero-downtime migration is editing your local hosts file. This allows you to see the new server while the rest of the world still sees your old site.
- Log into your Namecheap (or new webhost) cPanel
- In the right-hand sidebar, find your Shared IP Address (e.g.,
66.29.141.41). - Open your computer’s hosts file and add a line linking that IP to your domain:
66.29.141.41 jshowers.com www.jshowers.com - Now, when you type your URL into your browser, you are officially working on the New Host.
You can easily #comment that line out to switch between your new/old hosts locally.
Step 3: Bypassing Import Timeouts
Standard WordPress imports often fail on large sites because the server “kills” the process if it takes too long. If your first import attempt times out, you need to lift the restrictions.
3.1 Disable LiteSpeed Timeout
Add this to the top of your .htaccess file via the cPanel File Manager. This prevents the server from cutting the connection during the import.
Apache
# BEGIN REMOVE ME AFTER IMPORT
<IfModule mod_rewrite.c>
    RewriteEngine On
    RewriteCond %{REQUEST_URI} ^/wp-admin/admin\.php [NC]
    RewriteCond %{QUERY_STRING} import=wordpress [NC]
    RewriteRule .* - [E=noabort:1,E=nokeepalive:1]
</IfModule>
# END REMOVE ME AFTER IMPORT
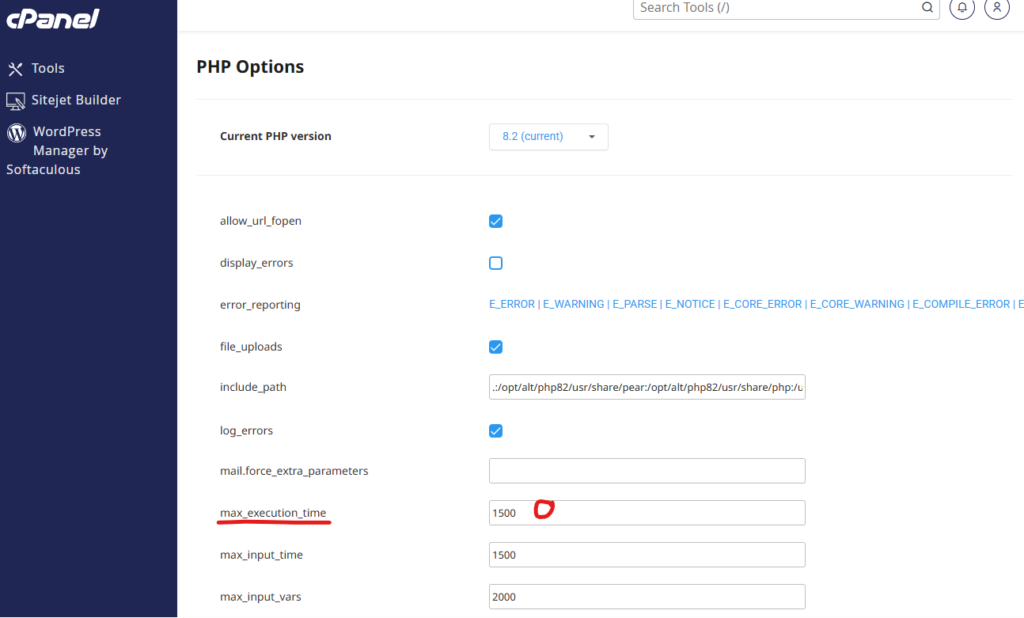
3.2 Bump PHP Execution Limits
In cPanel, search for “Select PHP Version”, go to Options, and find max_execution_time. Change it from 1500 to 0 (infinite).
Step 4: Run the Importer
- Navigate to WP-Admin -> Tools -> Import.
- Download WordPress imported if not present
- WordPress -> run importer -> upload file and import
- Upload the XML export file.
I highly suggest opening f12 network tools for this call. There is no progress bar or loading indicator and this can take a LONG time.
Once done, delete the .htaccess code and reset your PHP limits.
Step 5: Fixing Missing Images & Links
I had some issues with the XML importer renaming just a few images. Without wanting to debug this too much, I found a quick fix by manually moving all uploads over from my old host to my new one with the cPanel File Manager.
- Manual Image Move: Use cPanel File Manager on your old host to zip the
/wp-content/uploads/folders. Upload and extract that ZIP into the same directory on the new host. - The “-1” Link Bug: If your image links broke or added a “-1” to the filename, don’t fix them manually. Install the Better Search Replace plugin.
- Search for:
-1-768x1024.jpg - Replace with:
-768x1024.jpg
- Search for:
Step 6: Final Housekeeping & DNS
Once the site looks perfect to you, it’s time to tell the rest of the world.
- DNS Update: Go to Namecheap (or your registrar) and update your A Record or Nameservers to point to the new Shared IP.
- Subdomains: Recreate any subdomains in cPanel -> Domains.
- Email SMTP: To ensure your site can still send emails (like contact forms), install the WP Mail SMTP plugin and use your Namecheap email credentials.
- AdSense: Ensure you upload your
ads.txtfile to the root directory to keep your revenue active. - Plugins: Install SyntaxHighlighter Evolved if you have code snippets that aren’t rendering correctly.