I set out on a task to print this Deadpool knife holder that I found on thingverse for a friend. The entire sculpture from the artist comes in 4 pieces: 2 for the base, 1 for the mid section, and 1 for the top. I had recently purchased a copy of Simplify3D, and thought this would make it, you know, simple.
Unfortunately, my QIDI Tech 1 printer and Simplify3D don’t play 100% well with each other. Usually when importing models into Simplify3D, if the model is too large for the specific printer, you will get an error saying so. Apparently the dimensions are incorrect for the QIDI 1, and the model appears outside of the printer bounds.
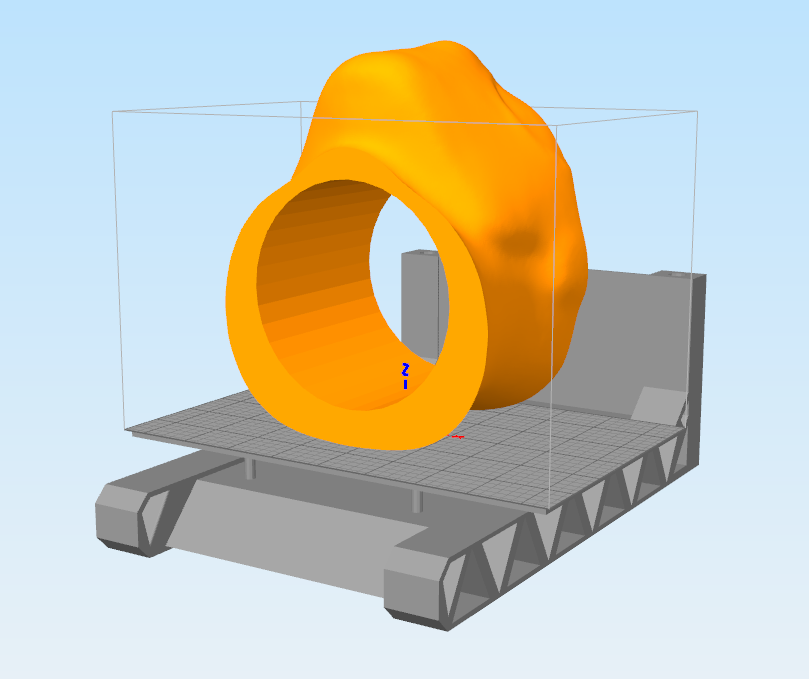
Splitting A Model In Half
I spent a few days trying to find a way to splice the model in half cleanly, so that I could easily glue it together post printing. Apparently this is no easy task – although I would have assumed this would be an option in Simplify3D itself. I tried a few free 3D modeling programs, like FreeCAD, but nothing seemed to work out for me.
Finally I read a suggestion that you can lower the model down below the print bed in Simplify3D, and only the above-bed portion will actually be printed. Even tinkering around with the model options like position offsets and rotation proved to be difficult to get the cut to be exactly in half for each portion. Simplify3D doesn’t just rotate the model around it’s center axis, but the bottom axis making me do some math to get the splice exact.
Here is a little Angular app to help split a model exactly in half down the x-axis.
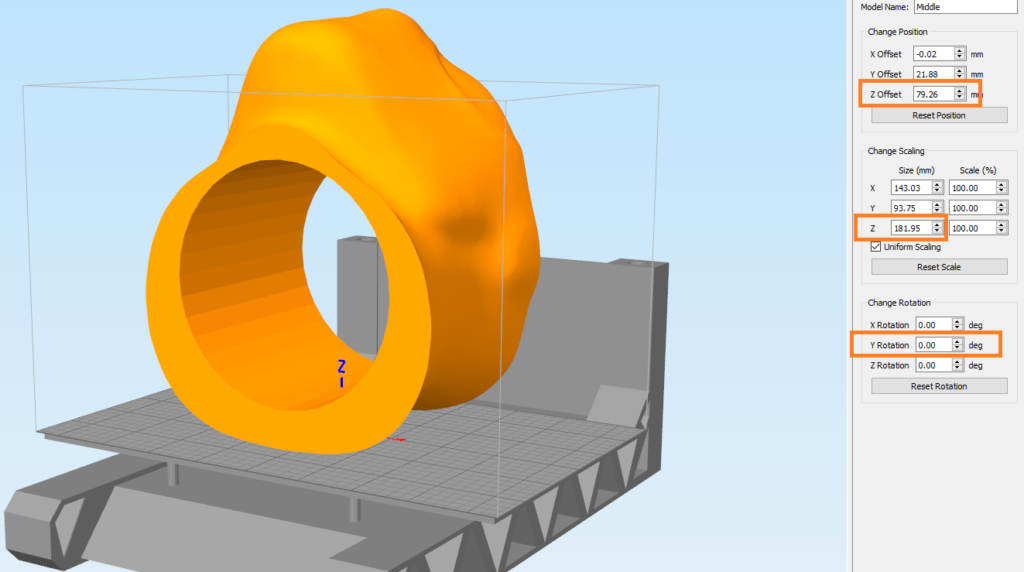
After importing my model and using the “center and arrange my models” command in Simplify3D, I can see my specific Deadpool model head has a z-height of 181.95, and a z-offset of 79.26.
Using the app above, generates some magic numbers to use for splicing the model in one half, rotating it, then splicing it exactly at the same point for the other half.
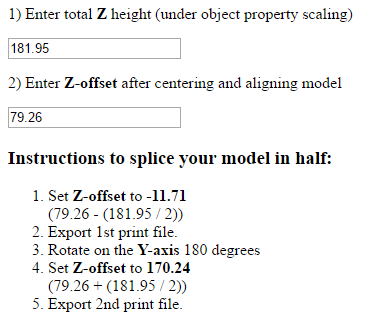
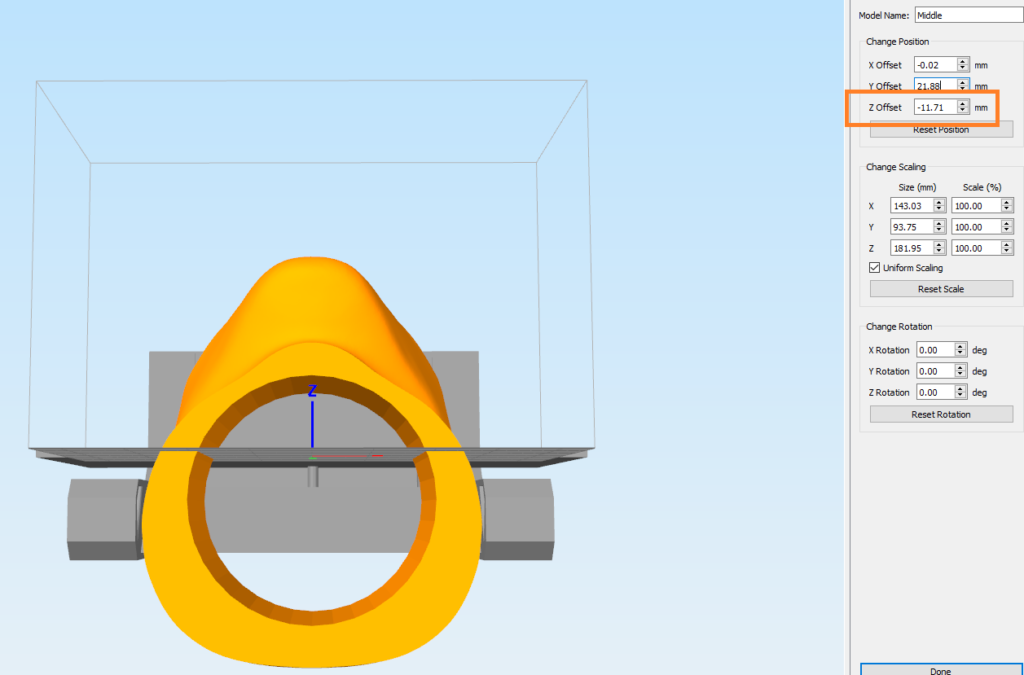
Using the directions above, I set the z-offset to -11.71 and export the print file for the first half of the print.
Then I rotate the Y-axis 180 degrees, and use the 2nd z-offset provided of 170.24. Export this file for the 2nd print.
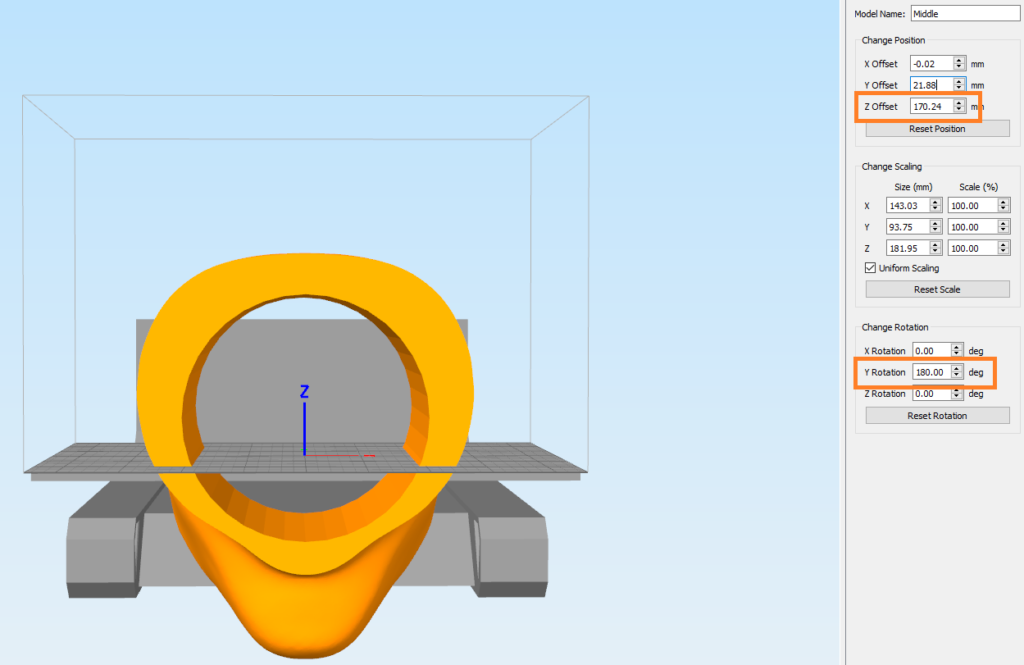
This gives you a perfect middle cut and will work with any model that is too big for your printer and needs to be broken up into two pieces.
The Code
Download here. The formula is pretty simple for this: take the total height, and divide by two. First sink the model that distance into the bed, then rotate 180 degrees (remember this is rotation around the bottom of the model, and no the center) and raise the model up another half of the total height.
//defaults
this.totalZ = 100;
this.centeredZOffset = 30;
this.zOffset1 = function() {
	return this.centeredZOffset - (this.totalZ / 2);
}
this.zOffset2 = function() {
	return this.centeredZOffset + (this.totalZ / 2);
}
I am regular visitor, how are you everybody? This paragraph posted at this website is really fastidious.
LIFE. SAVER.
Thanks! Going in my toolbox.