A domain email address is simply an email address that uses a purchased domain name. If I own the domain “ferrets.com” a few domain email address examples would be “jshowers@ferrets.com” or “admin@ferrets.com“. It’s important to set these email addresses up if you want your business to look professional. Some services such as LinkedIn even require a domain email address for registration of your business.
This guide assumes that you already own a domain name through Namecheap, have a web hosting package with HostGator, and want a domain email address you can check with Gmail. I will be using the example of “ferrets.com” as my domain name throughout this tutorial.
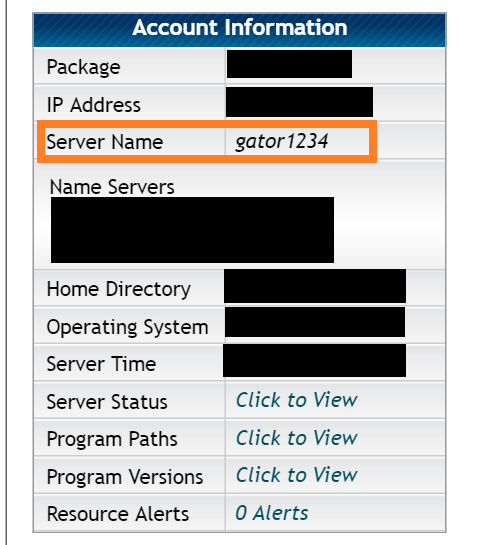
First, log into your HostGator cPanel account. At the very bottom left of the cPanel dashboard, you will see some details about your hosting package. We are only interested in the “Server Name” value for now, or “gator1234” in this example.
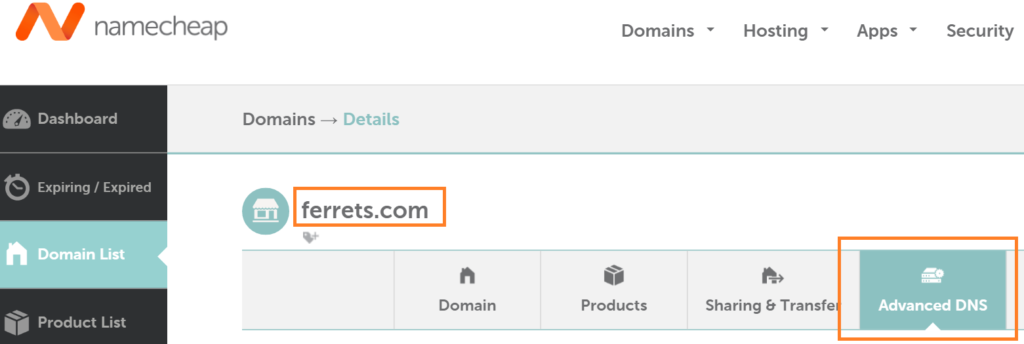
Next, log into your Namecheap account and click on the “Advanced DNS” link for your domain name.
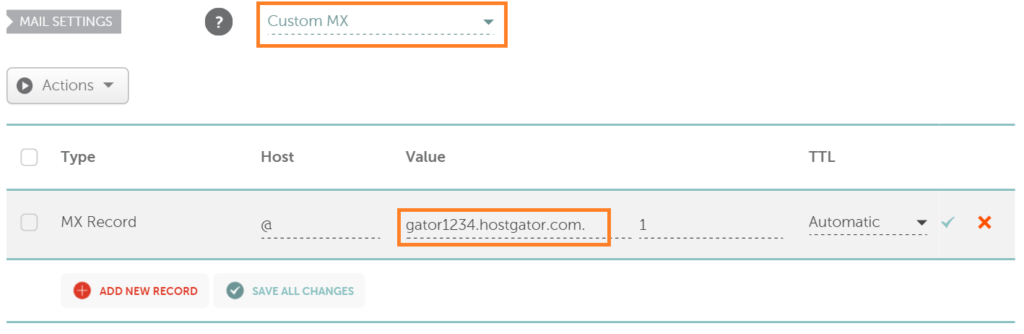
Scroll down to the mail settings section and select the Custom MX option. The MX record is a special DNS record that will forward any mail requests made to ferrets.com to our hostgator SMTP server gator1234.hostgator.com.
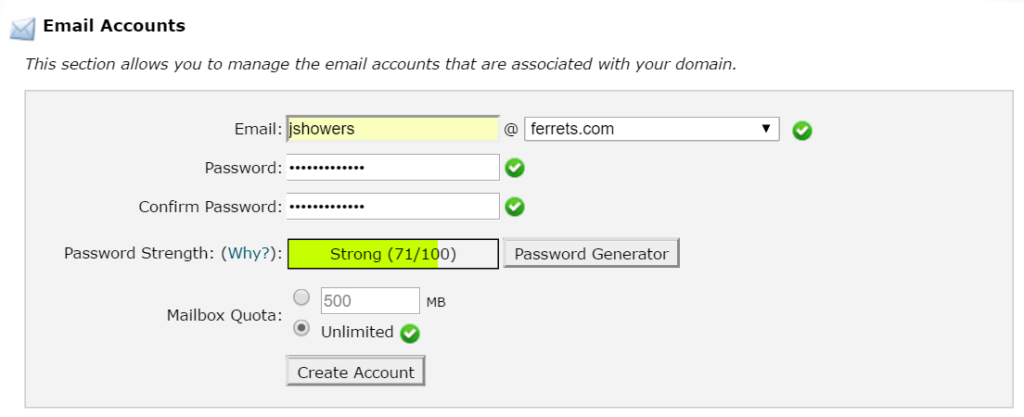
Next, we are going to set up the specific domain email address you want to use. Go back to the HostGator cPanel dashboard, and click on the email accounts link. I am generating the email address jshowers@ferrets.com in this example. Enter your details accordingly.
At this point you have all domain email being forwarded to your HostGator SMTP server, and a domain email account (including a password) set up.
Now let’s integrate Gmail into the mix so you can send and receive email from the new domain account into your existing Gmail account.
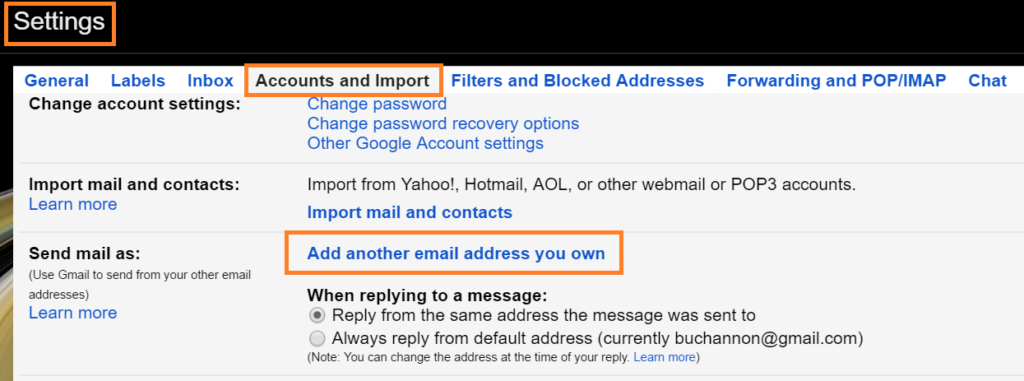
Log into Gmail and go to settings -> accounts and import -> add another email address you own.
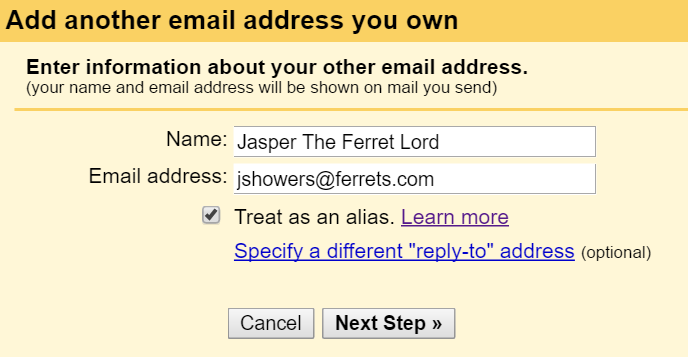
A popup will appear for you to set up this account with Gmail.
On the next step, you will need to enter all the information we set up previously with HostGator. Make sure to use port 465 and to enter the full email address as your user name.

Gmail will check these credentials against the HostGator server, and send a confirmation email with a code to the address entered. We are nearly done!
To get at this code, go back to your HostGator cPanel, mail -> webmail. Here choose any webmail client you want, this will probably be the first and last time you will log into HostGator’s webmail client. I chose SquirrelMail.

In your webmail inbox you will see an email from Gmail with the confirmation code. Go back to the Gmail configuration screen and enter this. Now you can send and receive mail from your new domain email address using your existing Gmail account.
hmm good posts.
This is a good,common sense article.Very helpful to one who is just finding the resouces about this part.It will certainly help educate me.
Hi mate, just a possible inclusion of putting the domain in “Addon Domains” first, otherwise it won’t appear on the list of domains when creating the email account (unless of course ferrets.com is the main domain you created the HostGator account with).
Cheers for the article, confirmed for me I’d done things right 🙂